
Service agreement screens
Page posted: 8/3/26
This page describes the service agreement screens used to authorize home and community-based services (HCBS) and other services. Each section includes a brief description of the information the screen contains. For a field-by-field description, refer to MMIS LTSS Manual – Service agreement fields.
For information about data entry into these screens, refer to MMIS LTSS Manual – Create a new service agreement.
It can be useful to reference Service Agreement, DHS-3070 (PDF), a fillable form that mirrors many of the MMIS service agreement screens, to view many of the fields in a service agreement at once. This form does not include fields in which MMIS populates data when working online in MMIS.
ASA1 screen
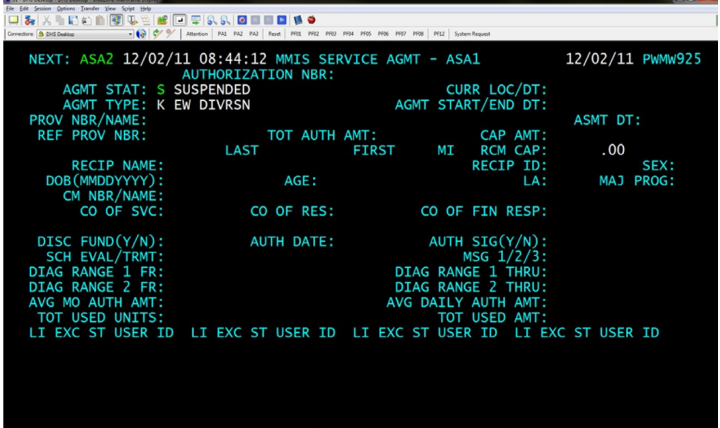
The ASA1 screen records general information.
Figure 1: ASA1 screen
ASA2 screen
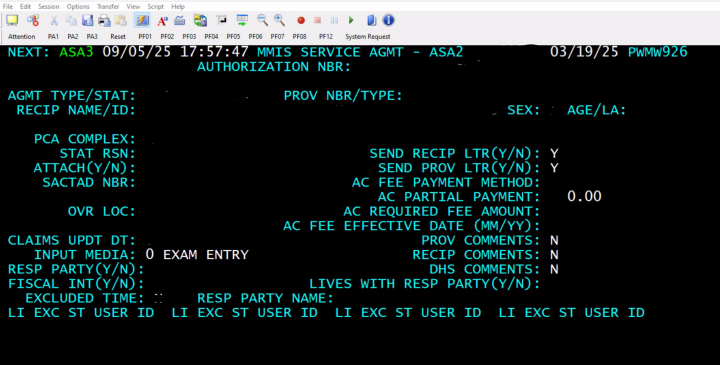
The ASA2 screen carries over data MMIS populated on the ASA1 screen (e.g., age). Not all fields on the ASA2 screen are used for every type of service agreement. Some are not used for waiver, Alternative Care (AC) or Essential Community Supports (ECS) service agreements. Other fields are only for AC service agreements or for service agreements that include personal care assistance (PCA)/Community First Services and Supports (CFSS) services.
Figure 2: ASA2 screen
ASA3 screen
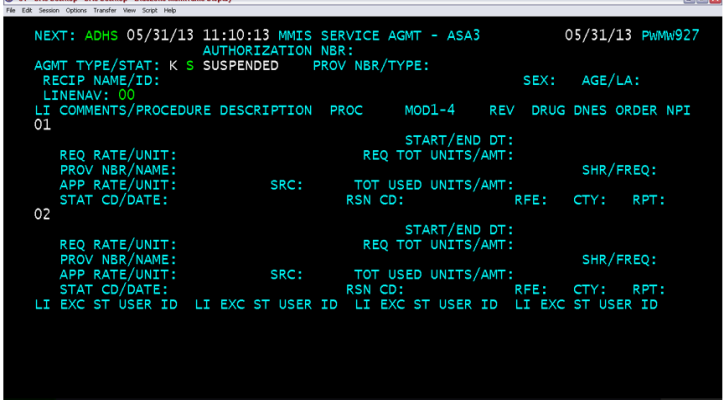
The ASA3 screen is where you enter service authorizations. The ASA3 screen can contain up to 99 line items. Each line item has information about the service, service code, units, time periods and rates.
Figure 3: ASA3 screen
Use the F7, F8 and F11 keys on the ASA3 screen
The ASA3 screen only shows two line items per screen. To add more service lines, press F11 to produce more blank line items.
A + (plus) sign in the top right corner of the ASA3 screen indicates there are more line items on the service agreement. To view additional line items:
For more information about navigation, refer to MMIS LTSS Manual – Service agreement navigation.
Comment screens
You can use comment screens to record information or add explanations to service agreement letters (including explanations for changes on the service agreement). MMIS service agreements include three comment screens:
Any person with inquiry access to the service agreement may view comments entered into any of the comment screens. Any comments entered on the APRV screen and ARCP screen will be attached to MMIS-generated provider and recipient letters, respectively.
It is helpful to date and add your initials to the message(s) you enter. You must remember to delete messages you no longer need. Otherwise, MMIS will continue to include them on provider and/or recipient letters.
MMIS comment screens do not include spell check or word wrap. Text stops at the bottom of the screen for the provider and recipient screens. If the text does not fit onto the screen, you will receive a message to delete text on the screen.
Copy text from the provider screen to the recipient screen
When using the change or add action in the service agreement, you can press F2 to copy text from the APRV (provider) screen onto the ARCP (recipient) screen. This feature is helpful if the same message is intended for everyone because comments will appear on the MMIS-generated letters.
To copy text:
1. Type the message on the APRV (provider) screen.
2. Press F2 to copy the message to the ARCP (recipient) screen.
You cannot copy messages entered on the ADHS (DHS) or ARCP (recipient). Messages from the DHS comment screen are not included in MMIS-generated letters.
Remember to delete the messages on the APRV and ARCP screens the next time you edit or add line items. If you do not, the messages will appear on the letters again. Do not delete DHS comments entered by DHS staff.
DHS comment screen
For some authorizations, you must add information to the DHS comment screen. For more information, refer to MMIS LTSS Manual – Authorize services that require additional steps.
Screen expansion and scrolling
The DHS comment screen expands to four screens. If the first screen is full, press F11 to bring up a blank additional DHS comment screen, if needed.
A + (plus) sign at the top-right corner indicates there is information on more than one DHS comment screen. To view all screens:
1. Move the cursor to the screen section.
2. Press F8 to scroll forward.
3. Press F7 to return to the beginning of the screens.
Additional resources
MMIS LTSS Manual – Authorize services that require additional steps
MMIS LTSS Manual – Create a new service agreement
MMIS LTSS Manual – Service agreement fields
MMIS LTSS Manual – Service agreement navigation
Service Agreement, DHS-3070 (PDF)
 Report this page