Death Data Match Create/Modify/Assign MN–ITS User Access
Revised: July 23, 2026
This guide instructs the PA or PPA how to create, disable or delete user accounts, apply specific user roles, update information, reset passwords and assign user access to the RECIPIENTFILE file type for accessing death data match information.
About User Administration
· You identified an individual as the MN–ITS primary administrator (PA) when you enrolled with MHCP. The PA controls user access to their MN–ITS account, not MHCP. It is important to keep a record of the PA for your organization.· A PA is able to create or modify both a PPA’s or User’s information and access, as well as their own. A PA is able to assign the role of PPA to more than one person.· The PPA is able to create or modify assigned User information and access, as well as their own.· An assigned User is able to change only their personal contact information. · Contact the MHCP Provider Resource Center at (651) 431-2700 or 800-366-5411 and select option 2 to:· Change a PA’s role to a different person than originally indicated· Change a PA’s account status· The User Administration function allows a PA or PPA to create, update and access the following:· MN–ITS roles· Account Status – Active or disable users· Contact information – Update phone numbers· Allow or limit a user’s access to:· File Transfer Protocol (FTP) Access – Assign, if applicable (up to five users)· MN–ITS Functions – Select the Interactive Functions you want the user to have· Mailbox Folders – Select folders appropriate for related functions· Applications/Forms/Lists – Select, if applicable· Service Agent Access Roles (MPSE)
Access the User Administrator Function
1. Use LoginMN to access MN–ITS.2. Select User Administration from the left menu of the MN–ITS homepage.
Create a New User
1. Select the Create User button.2. Complete all bolded (required) information.3. Email address field: Enter the user’s work email address and confirm email address. Important note: Due to security risks of using shared accounts, LoginMN requires a unique work email addresses for MN–ITS access and not a shared email address as this will be the user’s log in.For example, use Jane.Biller@companyname.com instead of info@companyname.com.
4. First Name: Enter the user’s first name5. Last Name: Enter the user’s last name6. MN–ITS Role: Select MN–ITS User or MN–ITS Secondary Admin (PPA) from the drop-down box, as appropriate.7. MN–ITS Account Status: Select Active or Disabled from the drop-down box.8. SFTP Status: Note: this step is only required if using SFTP. Secure FTP is used by batch billers to transfer and receive X12 and NCPDP Pharmacy data to and from DHS secure servers. Review Batch Submission User Guides to learn more. Select Active or Disabled from the radio buttons. *If you do not have the radio buttons but a message displays, follow the instructions in the message.9. User Access: Determine the appropriate Functions, Mailbox Folders and Applications/Forms/Lists to which you would like the user to have access. Select your provider type to review a list of Access/Views available.10. Click Save at the bottom of the page.11. A confirmation will display the newly created user ID.12. Inform the new user that they will receive an email with a link to complete the account registration process with LoginMN at the email address the PA provided when creating the account.
Update an Existing PPA or User Account
1. Select User Administration2. Search by: Last name, first name, user ID or all in the drop-down. To limit the search results, select Last Name or First Name in the Search by drop-down and enter at least three letters of a user’s last or first name.3. Account status defaults to Active. You can change the selection from the drop-down to limit the search results. Options: All, active and disabled.4. Click the Search button.5. Search Result defaults to 10 entries per page. You can change the number of entries shown by clicking on the drop-down to show 15, 25, or all. Sort the list, if necessary, by User ID, Full Name, Role or Account Status by selecting the column heading.6. Select the appropriate User ID in the left column of the list.7. Make appropriate changes in the user’s profile.8. Click Save at the bottom of the page to allow the change(s) or Cancel if you do not want to submit change(s).9. A confirmation notification will appear stating, “User Jane.Biller@businessname.com has been updated successfully.”
Create or Reset a Password
All users can use the Reset Password feature on LoginMN to reset their individual passwords. The MHCP Provider Resource Center cannot change passwords for MN–ITS users.
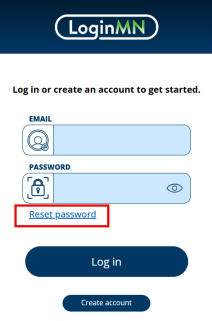
Do not share passwords or allow others to log in using your user ID (email address) or password.
Assigning Access to the RECIPIENTFILE File Type
To assign access to the RECIPIENTFILE file type when creating or modifying a user:
1. Scroll down to the mailbox folders section2. Select Provider Data Share
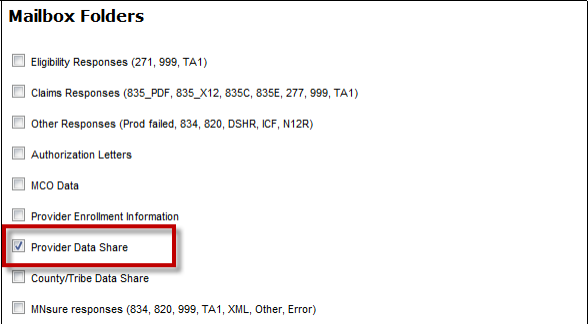
3. Select Submit
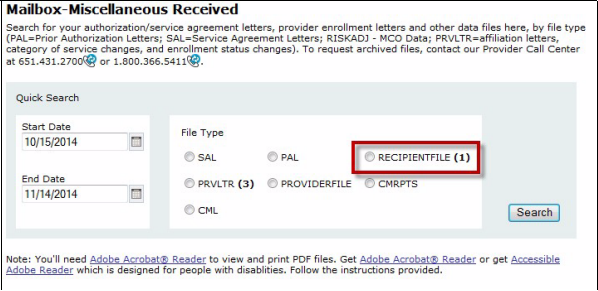
MN–ITS displays the RECIPIENTFILE file type in the Miscellaneous Received section of the mailbox after the first document is sent to the MN–ITS account.

 Report this page