New Individual Provider Enrollers
Revised: July 25, 2023
Overview
Minnesota Health Care Programs (MHCP) requires that all providers enroll with MHCP prior to providing MHCP services to members. Providers can use our online Minnesota Provider Screening and Enrollment (MPSE) portal to complete enrollment.
The information that MPSE requires you to enter in the program will be different based on your provider type and services you provide. This means the enrollment questions may be different for different types of providers. MPSE will show an asterisk (*) next to the field name for fields you are required to complete.
Use the Help link in the top, right corner of each MPSE portal page for help with defining specific fields and requirements for the MPSE portal page you are in.
MPSE Help link

Steps to Enroll as an Individual Provider
1. At the bottom of the Manage Portfolio page, which is the landing page for the MPSE portal, click Create a New Profile Request.2. Enter in the desired Request Effective Date. This is your application date. Click Continue.3. Complete the Profile Identifier section. a. Select Individual for the Portfolio Type. (If you are an organization, use the steps for New Organization Provider Enrollers).b. Enter either a Social Security Number (SSN) or federal employer identification number (FEIN). A provider can enter both.c. Do the following if an error message appears stating that the FEIN or SSN is already in use:i. Providers enrolling their own portfolio must follow the Retrieve Portfolio steps.ii. If you are enrolling an individual on that provider’s behalf, review the Organization to Individual Affiliations process to verify that you followed the steps appropriately.iii. Contact the MHCP Provider Resource Center with questions about this process.d. Once you have added all the information you need, click the Continue button at the bottom of the page to save your information and move to the next page in the MPSE portal.4. Complete the Individual Information section.a. The First Name, Middle Name, and Last Name you enter on this page must match the records with the Internal Revenue Service (IRS). b. Middle Name is required unless you do not have a middle name with the IRS. If the Middle Name is not applicable, check the box indicating this next to the field.c. The Self-Managed field defaults to No. If you are personally managing your own individual portfolio, change this to Yes to stop third parties from making changes to your portfolio.d. Once you have added all the information you need, click the Continue button at the bottom of the page to save your information and move to the next page in the MPSE portal.5. On the Manage Enrollment Records page, click on Add a New Enrollment Record at the bottom, left side of the page.6. On the Enrollment Record Information page, complete the information in the Enrollment Record Information section and the Tribal Information section.a. The field options and requirements will change based on the Enrollment Record Type that you select. Note that available services and required credentials found on other pages in the portal are also based on the Enrollment Record Type you select.b. You cannot select fields that are grayed out. These fields are for MHCP use or informational purposes only. Some examples include the Medicaid Agreement Indicator field, Risk Level field, and EFT Effective Date field. Depending on the selected Enrollment Record Type there may be additional fields that are grayed out and for MHCP use only.c. For more information about the EFT Vendor Number and EFT Vendor Location Code fields, refer to the Electronic funds transfer (EFT) or direct deposit section of the MHCP Provider Manual. Here you can enroll to receive payments for approved claims electronically.d. Once you have added all the information you need, click the Continue button at the bottom of the page to save your information and move to the next page in the MPSE portal.7. Complete the Physical Practice Address section.a. There are two columns in the Physical Practice Address section. Click the items in the Available Address Usage Types column that apply to the address entered on this page. This will move the items to the Selected Address Usage Types column.
MPSE section to select address usage types
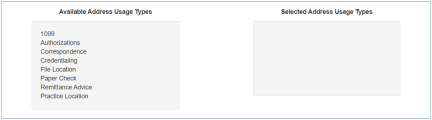
b. You are required to move Practice Location to the Selected Address Usage Types column. Select all other applicable items in the Available Address Usage Types that can be used for the address on this page. If the enrollment record requires separate addresses to be added for any of the other items in the Available Address Usage Types column, leave the applicable item(s) in the Available Address Usage Types column. c. Once you have added all the information you need, click the Continue button at the bottom of the page to save your information and move to the next page in the MPSE portal.8. Skip to Step 14 if you did not leave items in the Available Address Usage Types in Step 7. If there were items left in the Available Address Usage Types in Step 7, continue to Step 9.9. On the Manage Mailing Addresses page, click Add a Mailing Address.a. There are two columns in the Mailing Address section. Click the name of the items in the Available Address Usage Types column that applies to the address entered on this page. This will move the items to the Selected Address Usage Types column. b. Select all the applicable items in the Available Address Usage Types that can be used for the address on this page. If the enrollment record requires separate addresses to be added for any of the other items in the Available Address Usage Types column, leave the applicable item(s) in the Available Address Usage Types column. You will be able to add up to two mailing addresses. If you do not add File Location to the Selected Address Usage Types field in the Mailing Address section, you will be required to enter that address on a separate page in Step 13. c. Once you have added all the information you need, click the Continue button at the bottom of the page to save your information and return to the Manage Mailing Addresses page.10. Repeat Step 9 if you need to add additional mailing addresses or continue to Step 11. 11. Once you have added all the Mailing Addresses you need, click the Continue button at the bottom of the page to save your information and move to the next page in the MPSE portal.12. Skip to Step 14 if the Manage File Location Address page does not appear for you. The Manage File Location Address page only appears if File Location was not added to the Selected Address Usage Types column in either Step 7 or Step 9.13. On the Manage File Location Address page, complete the fields in the File Location Address section, and click Continue to go to the next page in the MPSE portal.14. At the bottom of the Provider Identifiers section, click Add a Provider Identifier.a. If you have a National Provider Identifier (NPI) from the National Plan and Provider Enumeration System (NPPES), enter your NPI in the NPI/UMPI field. If you do not have an NPI number, click Yes next to the Use UMPI field.b. The Effective Date is either the date your NPI was effective or is the date you are requesting your unique Minnesota provider identifier (UMPI) to be made effective.c. The Active field is for MHCP staff use only and you will not be able to select it.d. You can learn more about getting a provider identification number in the Enroll with MHCP section in the Provider Manual.e. Once you have added or updated all the information you need, click the Continue button at the bottom of the page to save your information and move back to the Provider Identifiers page in the MPSE portal.15. From the Provider Identifiers page, click the Continue button at the bottom of the page to save your information and move to the next page in the MPSE portal.16. On the Manage Services page, review the Enrollment Record Type Default Service Categories section to see a list of services that are automatically applied based on the Enrollment Record Type selected in Step 6. If there are no additional services to add for this provider, skip to Step 19.17. If there are other services you provide that are not listed on the Manage Services page for this enrollment record, add additional services by clicking the Add a Service button at the bottom of the page. a. Select the Service Name from the list provided and select a Service Begin Date. Note that Service End Date should not be entered at this time as that indicates that the service is no longer being provided.b. Once you have added the information you need, click the Continue button at the bottom of the page to save your information and move back to the Manage Services page in the MPSE portal.18. Repeat Step 17 until all services you provide have been added. Note that the services you added appear in the Provider Specialty and Packaged Services section of the Manage Services page of the MPSE portal. 19. Click the Continue button at the bottom of the Manage Services page to save your information and move to the next page in the MPSE portal.20. The Manage Medicare Enrollment Information page only appears if you answered Yes to the question “Are you, or is this facility enrolled with Medicare?” in Step 6. If you answered No in Step 6, Skip to Step 24.21. At the bottom of the Manage Medicare Enrollment Information, click the Add Medicare Enrollment Information button.22. In the Medicare Enrollment Information section, answer the required questions.a. The Medicare ID Number you enter must already be enrolled with Medicare. Do not enter a number here if you have not completed the process to enroll in Medicare.b. Once you have added the information you need, click the Continue button at the bottom of the page to save your information and move back to the Manage Medicare Enrollment Information page in the MPSE portal.23. Click the Continue button at the bottom of the Manage Medicare Enrollment Information page to save your information and move to the next page in the MPSE portal.24. The Manage Tribes page only appears if you answered Yes to at least one of the questions in the Tribal Information section in Step 6. If you selected No to both questions in the Tribal Information section of the Enrollment Record Information page in Step 6, Skip to Step 27.25. At the bottom of the Manage Tribes page, click Add a Tribe.a. Complete the required information in the Manage Tribes section.b. Once you have added the information you need, click the Continue button at the bottom of the page to save your information and move back to the Manage Tribes page in the MPSE portal.26. Click the Continue button at the bottom of the Manage Tribes page to save your information and move to the next page in the MPSE portal.27. Answer the questions in the Additional Enrollment Questions section. a. If you answer Yes to any of these questions in this section, you must include an Exclusion Reason for that question.b. Click the Continue button at the bottom of the page to save your information and move to the next page in the MPSE portal.28. On the Manage Credentials page, carefully review the required credentials, if any exist. Review the following information on how to know if there are required credentials for your enrollment.a. The Credentials section in the MPSE portal has a built-in guidance system that appears as a yellow box in the middle of the Manage Credentials page. b. If there is no yellow text box, the yellow text box is empty, or the only items in the yellow text box are marked as optional, skip to Step 32.c. This guidance system uses the Enrollment Record Type selected in Step 6 and the selections made on the Services page in Steps 14 through 17 to determine the credentials you are required to have. If you do not have the required credentials, review those previous steps to ensure your selections are accurate before continuing with your enrollment application. d. Some credentials that you are required to add in this section will be MHCP electronic forms. You can access these forms at E-Docs Searchable Document Library.e. You can learn more about the credentials required in the Enroll with MHCP section of the Provider Manual and reviewing the appropriate enrollment page for your provider type.f. The MPSE credentials guidance is laid out as a list of options available for you to meet enrollment requirements. In the following example, the box labeled Requirement Criteria lists the enrollment record type and service that determine the options available for meeting the credential requirements. The box labeled Option 1 indicates that all the items that follow it are required. The box labeled Option 2 indicates that only one of the items that follow it are required for verification. It is important to review these sections carefully as each credentialing requirement has its own specifications for being met.
Example of MPSE requirements yellow box:

29. If there are required credentials, or you need to add any optional credentials, click Add a Credential at the bottom of the Manage Credentials page. Take careful note of the credential you are going to add in this step because the credential selection screen mirrors the content in the yellow box, but you will not have access to the yellow box when selecting the credential.a. Select the appropriate credential listed in the yellow box from the previous page. Note that you can only select one credential at a time. If needed, there is a search bar above the available credentials that you can use to filter through the credential options.b. Click Continue at the bottom of the page to be taken to the Manage Credential page to enter in additional details about this credential.30. On the Manage Credential page, complete the required fields. a. Required fields have an asterisk (*) next to the field name. It is important to only complete the required fields as these pages impact the credentials guidance system.b. Once you have added all the information you need, click the Continue button at the bottom of the page to save your information. This will take you back to the Manage Credentials page.31. Repeat Steps 29 through 31 until all required credentials and optional credentials you wish to add are in the Credentials section of the Manage Credentials page.32. On the Manage Credentials page, click the Continue button at the bottom of the page to save your information and move to the next page in the MPSE portal.33. On the Manage Fees page, click Continue to move to the next page in the MPSE portal. Individual providers are not required to pay an application fee.34. Skip to Step 35 if you did not choose Physical Therapist for the Enrollment Record Type in Step 6.a. Click Add a Site Visit at the bottom of the Manage Site Visits page if you are enrolling as a Physical Therapist.b. Complete the Site Visit Information section of this page.c. Click Continue at the bottom of the page to save your information and be taken to the Manage Site Visits page.35. On the Manage Site Visits page, click Continue to move to the next page in the MPSE portal.36. The Manage Facility/Agency Identifiers page is for MHCP staff use only. Click Continue at the bottom of the page to move to the next page in the MPSE portal.37. On the Manage Agreements/Addendums page, review the Required but Missing Agreements/Addendums section. This section indicates any agreements or addendums that MHCP may require as part of your enrollment but have not yet been uploaded to the enrollment record. Once you upload the required agreement(s) or addendum(s), the Required but Missing Agreements/Addendums section will automatically be updated.
Example of MPSE message that appears if documents are required:

38. At the bottom of the Manage Agreements/Addendums page, click Add Agreement/Addendum.a. Complete the fields with an asterisk (*) next to the field name. Note that the Digital Signature and Signers Title should be signed by the person with the authority to sign agreements or addendums, and the Signature Date should be the date the agreement or addendum was uploaded in MPSE. The person uploading the document in MPSE may or may not be the same as the person signing the actual agreement or addendum.b. Once you have added all the information you need, click the Continue button at the bottom of the MPSE page to save your information and return to the Manage Agreements/Addendums page39. Repeat Step 38 until the Required but Missing Agreements/Addendums section has disappeared from the Manage Agreements/Addendums page.40. At the bottom of the Manage Agreements/Addendums page, click Continue to move to the next page in the MPSE portal. 41. On the Manage Limiting Caseload page, you can submit forms to limit your acceptance of new MHCP members to your practice while remaining in compliance with Rule 101. If this applies to you, complete the information on this page. If this does not apply to you, click Continue at the bottom of the page to move to the next page in the MPSE portal.42. You can use the Manage Notes page to communicate information to MHCP that you cannot communicate in other areas of the enrollment application. It is optional to add a note. If you choose to not add a note, skip to Step 44.43. Click Add a Note at the bottom of the Manage Notes page.a. Enter your Note Text.b. Click Continue at the bottom of this page to go back to the Manage Notes page.44. At the bottom of the Manage Notes page, click Continue to move to the next page in the MPSE portal.45. The Manage Enrollment Status page is for MHCP staff use only. Click Continue at the bottom of the page to move to the next page in the MPSE portal.46. You will not use the Manage Revalidations page during the initial enrollment. Click Continue at the bottom of the page to move to the next page in the MPSE portal.47. The Manage Individual to Organization Provider Affiliations page is optional. Providers who choose to affiliate themselves to an organization must add the organization they are being affiliated to. If you choose to not affiliate your enrollment record to an organization, skip to Step 49.48. At the bottom of the Manage Individual to Organization Provider Affiliations page, click Create New Affiliation.a. Enter the NPI or UMPI of the organization you are affiliating to and click Search at the bottom of the page.b. If an organization matching the entered NPI or UMPI is enrolled with MHCP, their enrollment record will appear in the Search Results section of this page.c. Click Select in the User Actions column of the Search Results section. Note that, depending on the size of your browser window, you may need to scroll the search bar on the right side to see this column.d. Enter the Start Date for the affiliation. Note that you should not enter the End Date at this time.e. Click Continue to go back to the Manage Individual to Organization Provider Affiliations page of the MPSE portal.f. Repeat Step 48 to add affiliations to additional organizations as needed.49. At the bottom of the Manage Individual to Organization Affiliations page, click Continue to move to the next page in the MPSE portal. 50. The Manage Service Provider to Trading Partner Affiliations page is optional. If you choose to affiliate to a trading partner, you must add the trading partner you are affiliated with. If you choose not to affiliate to a trading partner, skip to Step 52.51. At the bottom of the Manage Service Provider to Trading Partner Affiliations page, click Create New Affiliation.a. Enter the NPI or UMPI of the trading partner you are affiliating with and click Search at the bottom of the page.b. If a trading partner matching the NPI or UMPI you entered is enrolled with MHCP with an active enrollment status, their enrollment record will appear in the Search Results section of this page.c. Click Select in the User Actions column of the Search Results section. Note that, depending on the size of your browser window, you may need to scroll the search bar on the right side to see this column.d. Complete the Affiliation Information section of this page.e. Once you have added the information you need, click the Continue button at the bottom of the page to save your information and move back to the Manage Service Provider to Trading Partner Affiliations page in the MPSE portal.52. At the bottom of the Manage Service Provider to Trading Partner Affiliations page, click Continue to move to the next page in the MPSE portal. 53. On the Manage Enrollment Records page, you have two options:a. If you have more than one business location that provides a service, you must enroll each business location. To add additional enrollment records to your profile request, follow Steps 5 through 50 of this individual provider enrollment guide.b. If you are finished adding all your enrollment locations, click Continue at the bottom of the Manage Enrollment Records page.54. On the Manage Owners/Authorized Persons page, you have two options:a. To add a person that MHCP can contact if we have questions about your enrollment, called a “credentialing contact,” follow Steps 53 through 57. Note that this step is optional.b. To submit your application without a credentialing contact, continue to skip to Step 60.55. At the bottom of the Manage Owners/Authorized Persons page, click Add a Person.a. The First Name, Middle Name, and Last Name entered on this page must match the individual’s records with the Internal Revenue Service (IRS). b. Middle Name is required unless the individual does not have a middle name with the IRS. If the Middle Name is not applicable, check the box indicating this next to the field.c. Once you have added all the information you need, click the Continue button at the bottom of the page to save your information and move to the next page in the MPSE portal.56. On the Manage Role Types page, select Credentialing Contact in the Role Types field and click Continue.57. Complete the Owner/Authorized Person Role Information section.a. Enter the desired Start Date for the role type. Note that you would only add an End Date when the credentialing contact is ending and you should not add it at this time.b. Select the Enrollment Record that this authorized role type applies to. If you have multiple enrollment records, you can select Apply this role to all Enrollment Records in the Enrollment Record field to apply the authorized role of credentialing contact for this person to all the enrollment records in the portfolio.c. Once you have added all the information you need, click the Continue button at the bottom of the page to save your information and move to the next page in the MPSE portal.58. At the bottom of the Manage Owners/Authorized Persons Roles page, click Continue.59. On the Manage Owner/Authorized Person Detail page, the fields are all optional. a. We recommend you complete at least one field in the Owner/Authorized Person Detail section so MHCP has someone to contact with questions. It does not matter which field you complete.b. The Relationship Information section is only needed in the circumstances detailed in the blue box under the title of this section.c. Once you have added all the information you need, click the Continue button at the bottom of the page to save your information and move to the next page in the MPSE portal.60. At the bottom of the Manage Owners/Authorized Persons page, click Continue.61. You can use the Manage Notes page to communicate information to MHCP that you cannot communicate in other areas of the enrollment application. It is optional to add a note. If you choose to not add a note, skip to Step 63.62. Click Add a Note at the bottom of the Manage Notes page.a. Enter your Note Text.b. Click Continue at the bottom of this page to go back to the Manage Notes page.63. At the bottom of the Manage Notes page, click Continue to move to the next page in the MPSE portal.64. On the Submit Request page, review for any Request Errors that may appear. a. You will need to resolve any errors that appear before you submit your request. If there are errors listed, click the Go To link that appears next to the error to go to the MPSE page where the error can be resolved. Once the error is resolved, click Submit Request in the right-side navigation to return to the Submit Request page.b. If there are no errors listed on this page, complete the Attestation by reading the statement and then click the checkbox if you agree.c. At the bottom of the Submit Request page, click Submit for Approval. 65. On the Submission Approval page, there are a few features available to you:a. An optional survey where you can report your experience using the MPSE portal. We encourage you to take this survey as we continue to make updates and improvements to the MPSE portal.b. Contact the MHCP Provider Resource Center with any questions you may have.c. A Download All Documents button at the bottom of the page that you can use to download a zip file containing all documents that you uploaded as part of this enrollment application as well as the Summary Report, which is a detailed PDF containing all the information you submitted for your enrollment application.d. Click Continue at the bottom of this page to go to your Manage Portfolio page. Note, if you are enrolling a provider on their behalf through the Organization to Individual Affiliations process, you will be taken to the Manage Organization to Individual Affiliations page of your organization’s portfolio.
Enrollment Application Follow Up
After submitting the initial enrollment application using the MPSE portal, MHCP recommends logging into the MPSE portal at least once or twice per week to review the Status/Outcome of your request.
Example of a Submitted Request in the MPSE portal:

· The Submit Date column on the left has the date you submitted your request.· MHCP has 30 calendar days from the Submit Date of your request to process your application.· The Request Actions column has several actions you can take on your request.· The View Request link allows you to review the submitted items. Note that users will not be able to make changes to a request using this function.· The Revert To Draft link allows you to change the Status/Outcome to Draft which will then display an Edit link in the Request Actions column. Note that the Submit Date will change if a request is reverted to draft and resubmitted on a different day.· The Summary Report link allows you to download a PDF version of your submitted request.· The View Differences Report link is not useful in this scenario and you should not use this link.
Processing Timeline
The Status/Outcome column on the Manage Portfolio page of the MPSE portal indicates where your application is in the Processing Timeline.
· If it has been more than 30 calendar days since your Submit Date, and the Status/Outcome column still reads Pending Review, please contact the MHCP Provider Resource Center to request a ticket to be opened for Provider Enrollment. · If the Status/Outcome column changes to Draft - Returned, that means that you need to take action on the request in some way. · You should watch for a Request for More Information letter that MHCP sends through the U.S. Post Office when the Status/Outcome column changes to Draft – Returned status. The Request for More Information letter will detail missing items or items that need correction on your initial application. · If the Status/Outcome column reads Completed – Approved, that means that MHCP has process and approved your application. · Look for a Welcome Letter from MHCP detailing next steps you need to take. On the Manage Portfolio page, you can review your request at the bottom of the page to ensure that it was submitted properly. You will find other options for the request you submitted to delete, return it to draft status or print a summary report.
 Report this page